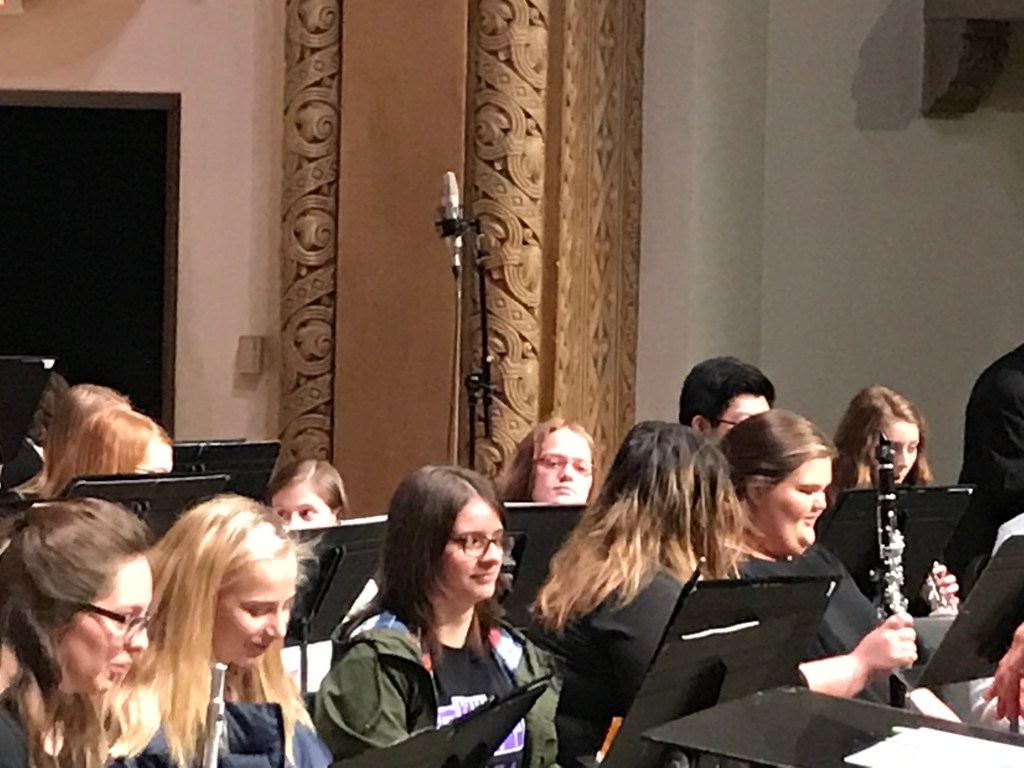
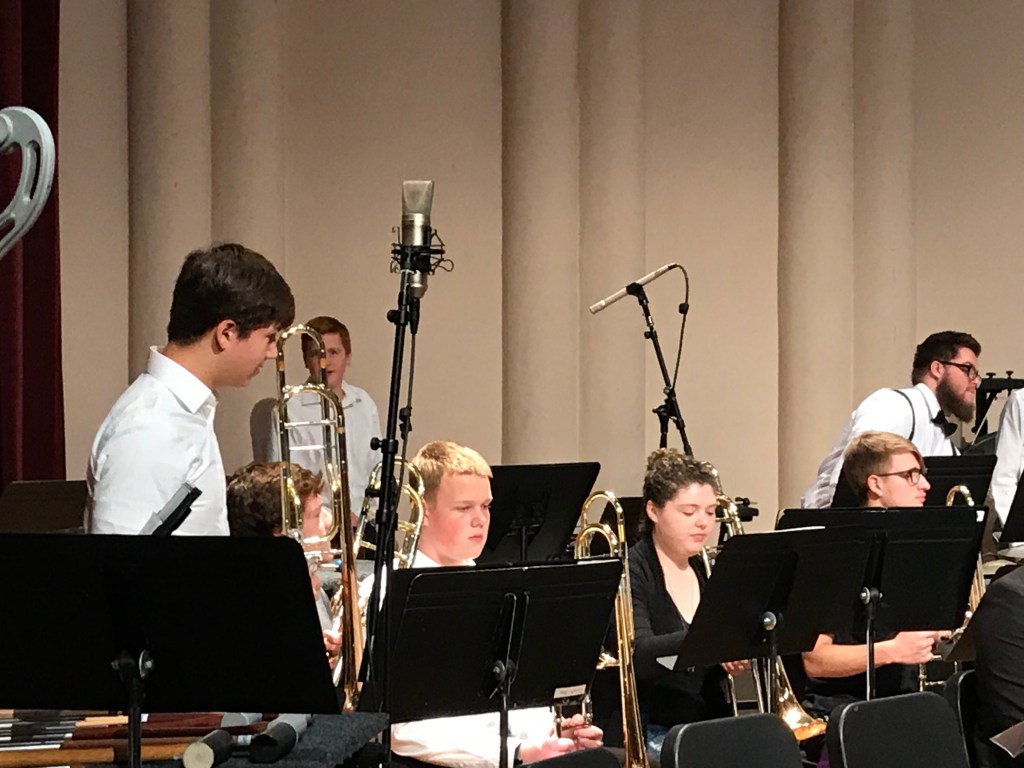
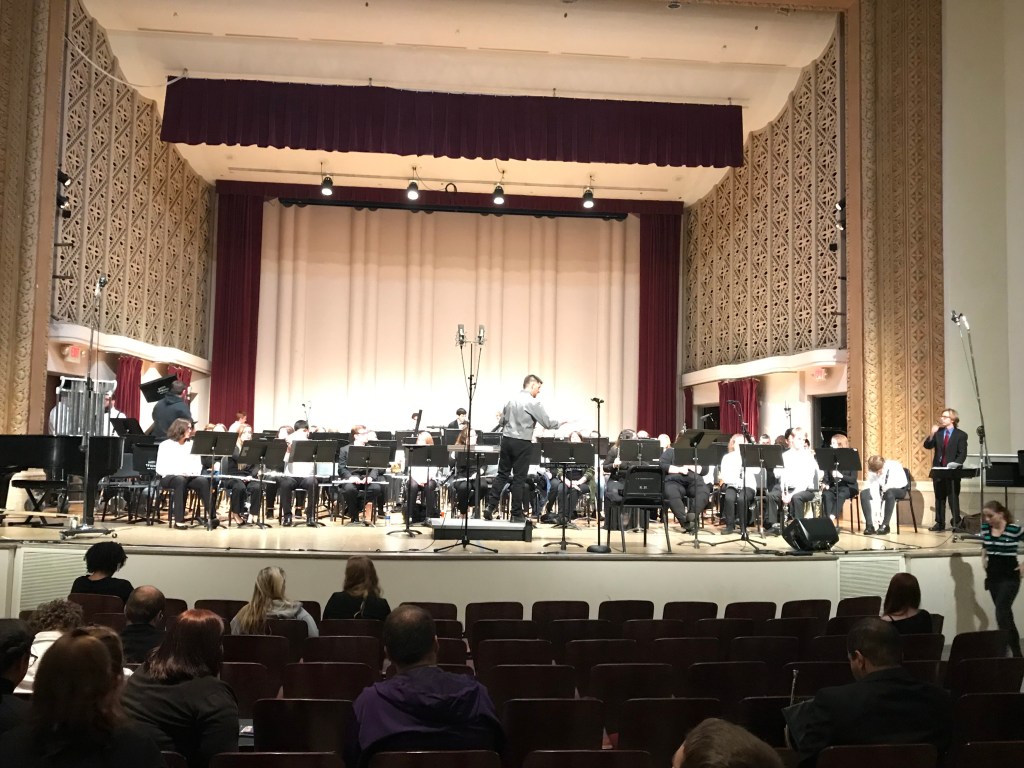
Winds Symphony Recording
After learning a lot from the masterclass with Bruce Gigax, I felt very prepared for this session. From communicating with the conductor, Dr. Gershman, I learned that the only “out-of-the-ordinary” thing was a vocalist on one of the Wind Symphony pieces.
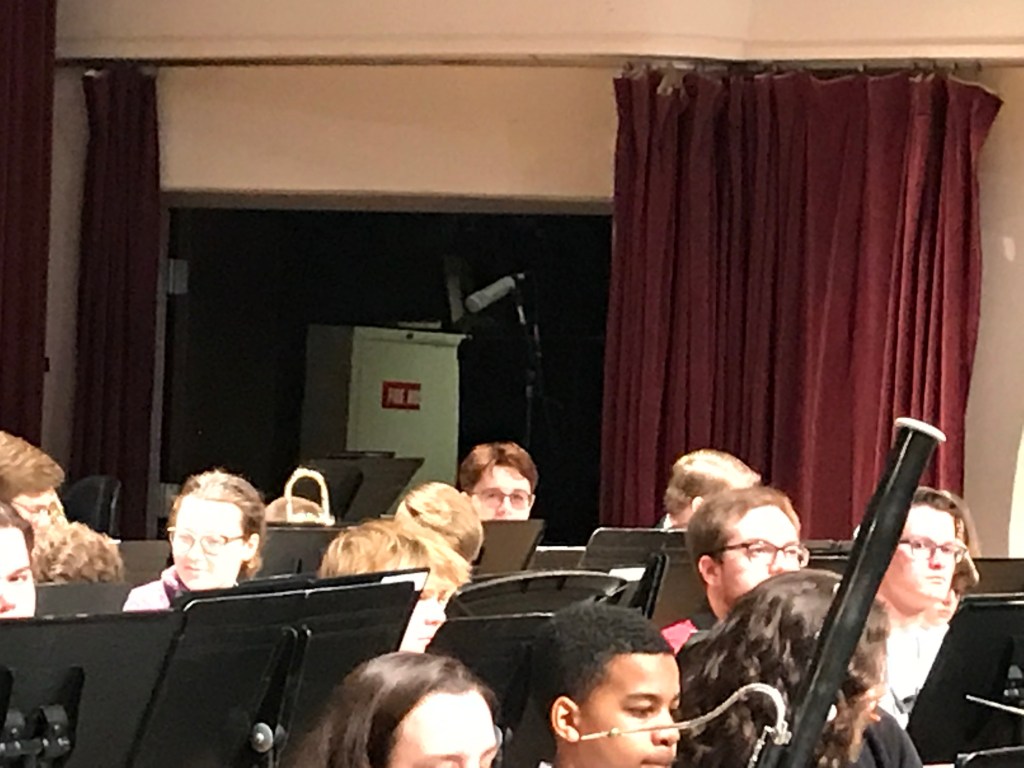
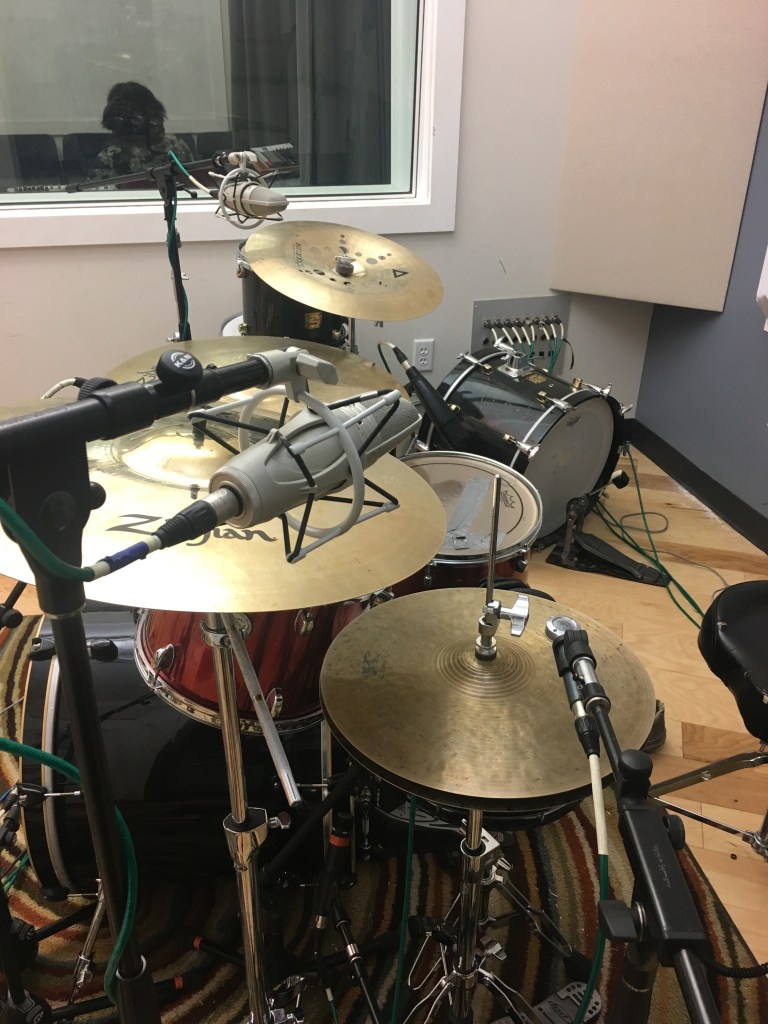
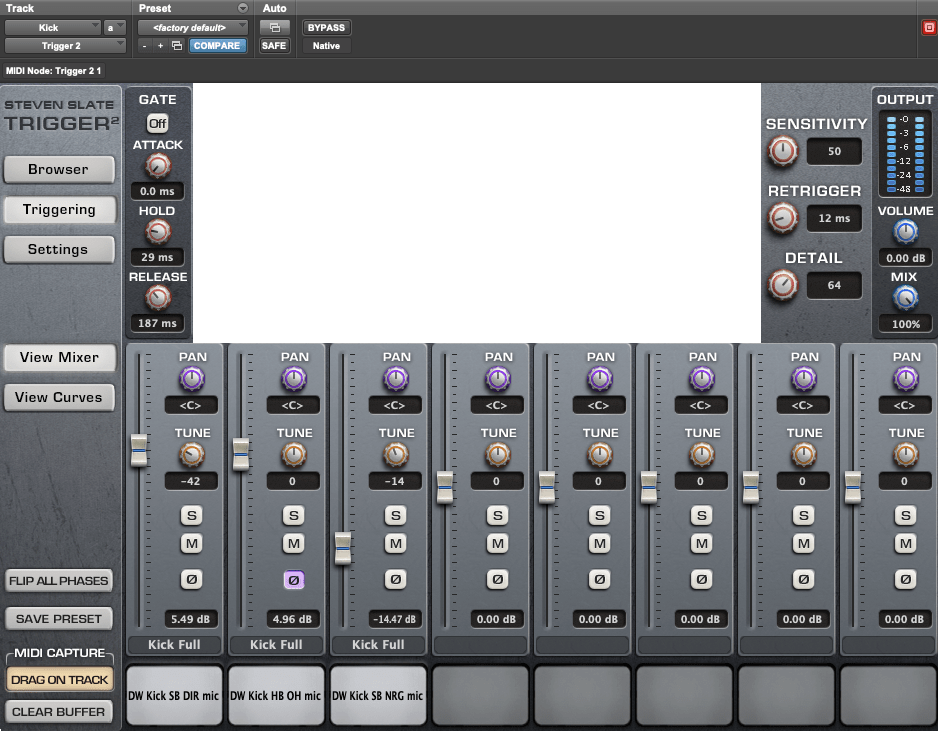
We devised a plan very similar to what Bruce had setup earlier in the year. A stereo pair of U87’s in the center down stage, c414’s on the far edges of the stage, and a pair of Rode NT2’s. in the middle the ensemble. To help cover percussion, we added a mic near the timpani, and the soft mallet percussion, marimba, and vibraphone. Here are some pictures that illustrate these placements.

Solo Tracking Session – Grigio
I recorded the talented 3-piece band Grigio from Dayton, Ohio. They are an active, gigging band, that just completed their first tour this summer! I have plans to record a full album with them later this year.
I have recorded them before, and got in contact with them about this project:
This song “Moonshine On My Mind” is in a grunge rock style. Nirvana/ Pearl Jam-esque.
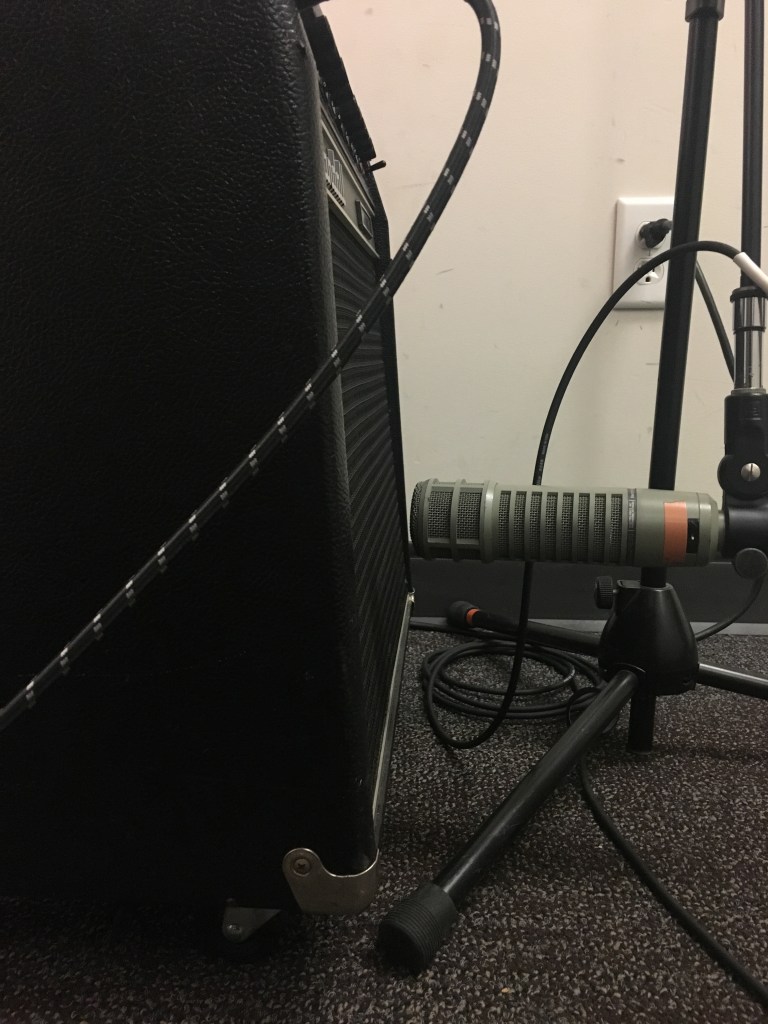
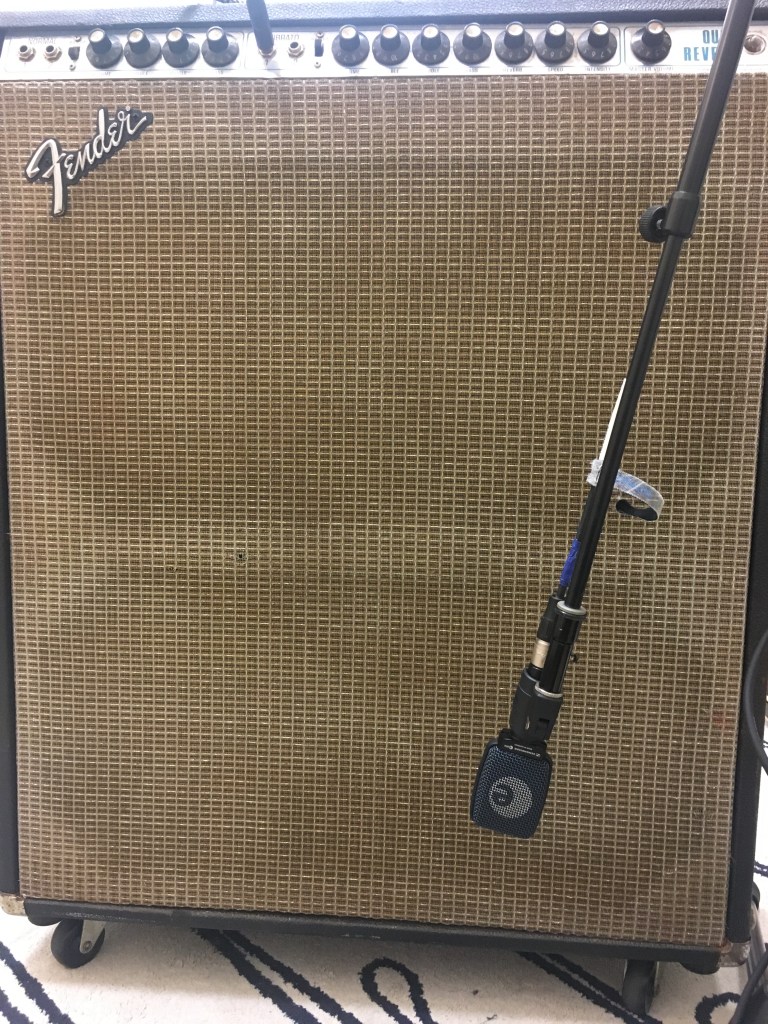
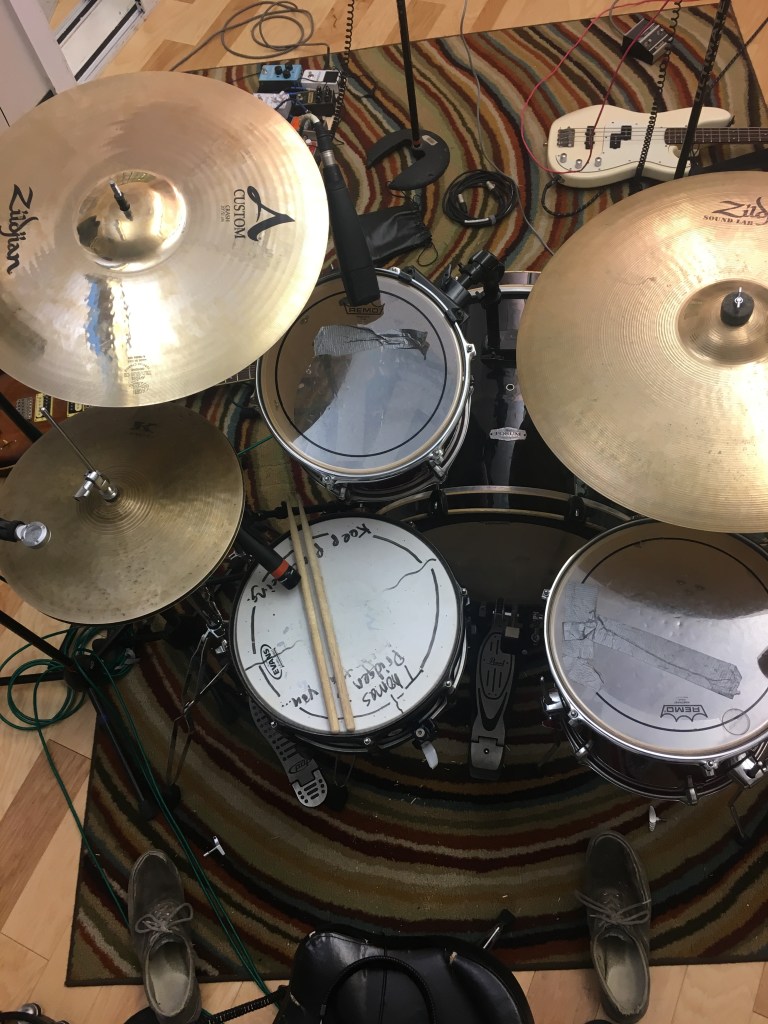
Here’s some pictures on my mic setup:
Here’s the finished product!
After some feedback here’s a revised version!
Auto Tune!
This week, I used the AutoTune 8.1 plug-in for the first time. This track consisted of a lead vocal in the verse and six harmony background vocals in the chorus. For the verse lead vocal, I used the Auto mode. This mode reads the audio and automatically tunes the pitch to the closest in s 12-tone equal temperament system. The speed of this can be adjusted to make it less robotic. Additionally, the “flex-tone” setting can be adjusted. This setting is similar to a soft-knee on a compressor. It eases the auto-tuning rather than being either on or off. I removed some notes that were out of the key that the vocalist consistently wavered towards.
For the vocal harmonies I used the graph mode of Auto-Tune. This mode has much more fine-tuning capabilities, but also takes much more time. I used mainly that point tool and the note drawing tool for these tracks. The point tool allows you draw a straight line from point A to B which it will then use to approximate a good starting point for the tuning. This can be adjusted using the tuning speed knob. Generally, a faster tuning speed will make it sound more robotic. This can work for vocal takes with less vibrato on them. The note tool allows you to draw the exact notes on the track almost like MIDI. This works well for sustained notes, but makes the vocals sound very jerky when in the middle of of a passage.
Here’s what I came up with in the end!
Spoken Vocals Mic Shootout
One of the most common questions I get asked when someone learns I know about audio is “What are good mics for podcasts?” because everyone and their “hip” aunt is trying to start a podcast nowadays. So I set out to find a good mic I can recommend for female wannabe podcasters.
From this article at “The Podcast Host” , I learned what makes a good spoken vocal mic. It talked less about technical specifications and more about utility. For example, with one bipolar microphone, a person could record two people. This article from Radio.co taught me about some of the industry standards like the EVRE20 and the Shure SM7b.
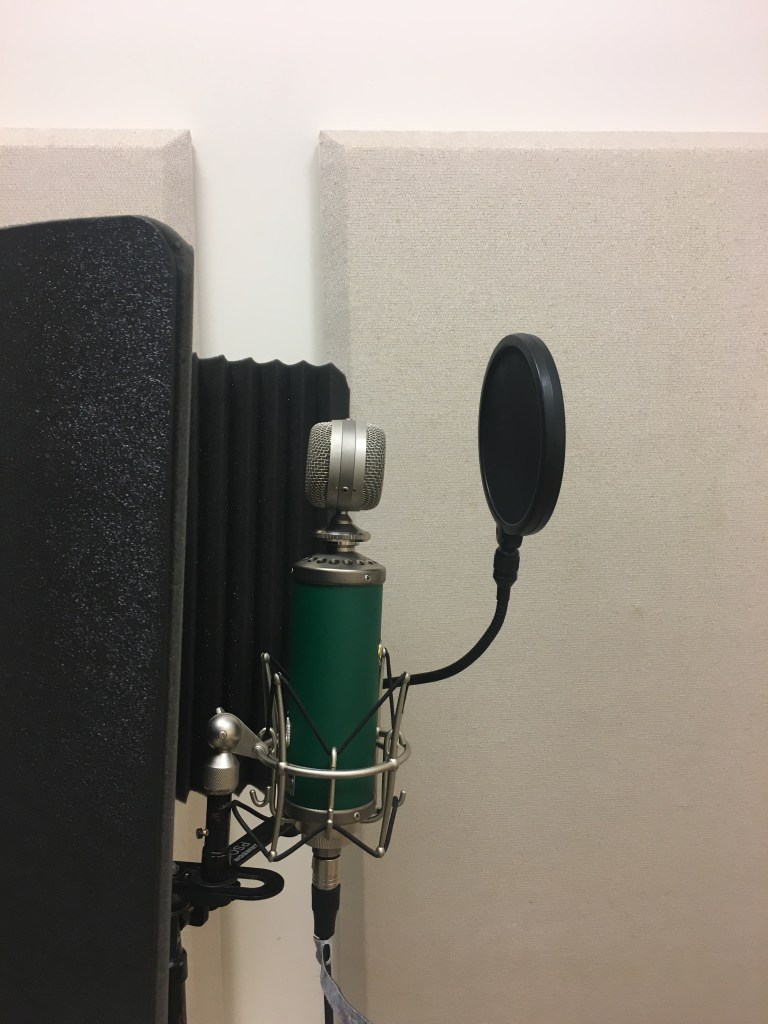
After this research I chose 4 mic: The AEA-84, EVRE20, SM7b, and the Blue Kiwi. I have used all of these mics in the past, but I have only used one for spoken vocals. The AEA-84 is a ribbon microphone. I wanted to see how the sensitivity would affect a female voice. The EVRE20 is what I have seen in various radio booths so I was curios to but this standard dynamic mic known for its full low-end against these others. The SM7b, another industry standard, has a problem with getting good signal. Though the sound may be small it is of decent quality, or else it would not see so much use for vocal recording. I have only ever used the Blue Kiwi to record steel pan. I loved it’s sound and wanted to try it.
I had my “client” (shout out to Madie Bishop) read several lines in her normal voice of a Shakespeare play. This gave a nice mix of different vocal sounds. Upon listening to them, the AEA has a very thin and almost muffled sound. The EVRE20 has a much more full low end, but for whatever reason produced harsher consonants, especially S’s. The SM7b, though I had to apply clip gain, sounded great! It had a full low end without hissy high frequencies. The Kiwi had a great sound, but it picked up much more room sound than the others. I purposefully conducted this test in a room with noise as to replicate what many amateur podcast environments are like.
Overall, my ranking would be:
- SM7b- best overall sound, volume can easily be fixed in post
2. EVRE-20 – Second best sound- hissy consonants can be EQed or De-Essed
3.Blue Kiwi – The room tone pick up along with a decent but not great sound landed the Kiwi in third.
4. AEA-84 – The utter lack of low end makes this mic too thin to produce good talking audio.
Advanced Recording Techniques First Tracking Session
Recently I and brandon Clare recorded “Lohman Complex” a band of Capital students led by the multitalented Chris Brown. Here’s a video about our process:
We recorded the bass, lead guitar, sax, and drums together live. We did around 5 takes as the band refined certain things each time. Later, the trumpet player came in and we tracked trumpet, vocals, and auxiliary percussion at the same time. We did several more vocal takes after to iron some things out. Between every other take or so we had the band come in and listen. Their comments gave us ideas on how they wanted the mix to eventually sound.
After some time in the mixing suite I came up with this first draft of the mix:
After some more listening and mixing, here’s the final version of the mix. I consulted with the band leader and listened on a lot of different speakers and devices. From this listening I made little adjustments to every track and started adding automation mainly to volume. One of the main changes i had to make was to bring the vocals down dynamically so they would fit into the mix better. Sometimes this also meant bringing the ensemble up to match the intensity of the vocals. I fine tuned some compression and EQ on the Guitars to make them more distinct in the mix. I added some delay and phasing to the guitars at the beginning to give it some interesting ambience. In my revision I added a second compressor to the vocals just to catch the belting type singing. I changed the settings on the other compressor to smooth the vocals more evenly. I also used clip gain to tame some of the really loud sections. I upped the verb send on the Hi-Hat track to make it more in the space of the rest of the kit. Hope you enjoy!
Elastic Audio and SSD Trigger 2
Elastic Audio
The elastic audio function of pro tools is extremely helpful for refining a musician’s performance on a recording. This feature allows you to move moments in musical time without ruining the integrity of the audio. For example, if a drummer’s back beat is inconsistent, elastic audio can be used to realign them with the rest of the performers.
To begin working with elastic audio, you must enable the drop down box in the edit window views of the tracks, then change the track view to “Warp”. Once this is done, the track should look something like this.
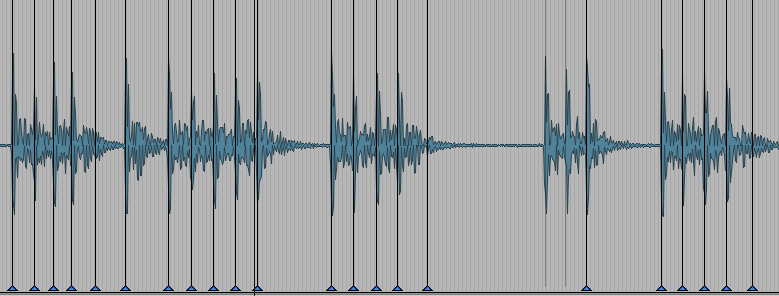
The blue triangles will appear after you begin moving around the transients. Be careful! If the simply click a transient and begin to move it, the audio will be stretched in relation to the beginning and end of the track this will cause other places to become misaligned. To more effectively and efficiently move transients, shift click. This will add a marker to the two transients on either side of the one you want to move. These will act as “anchors” so the audio does not affect other parts of the track.
(Quick Tip: When realigning parts try to use other tracks and use their transients as a reference. Or change to to bars and beats counter if the track was recorded to a click.)
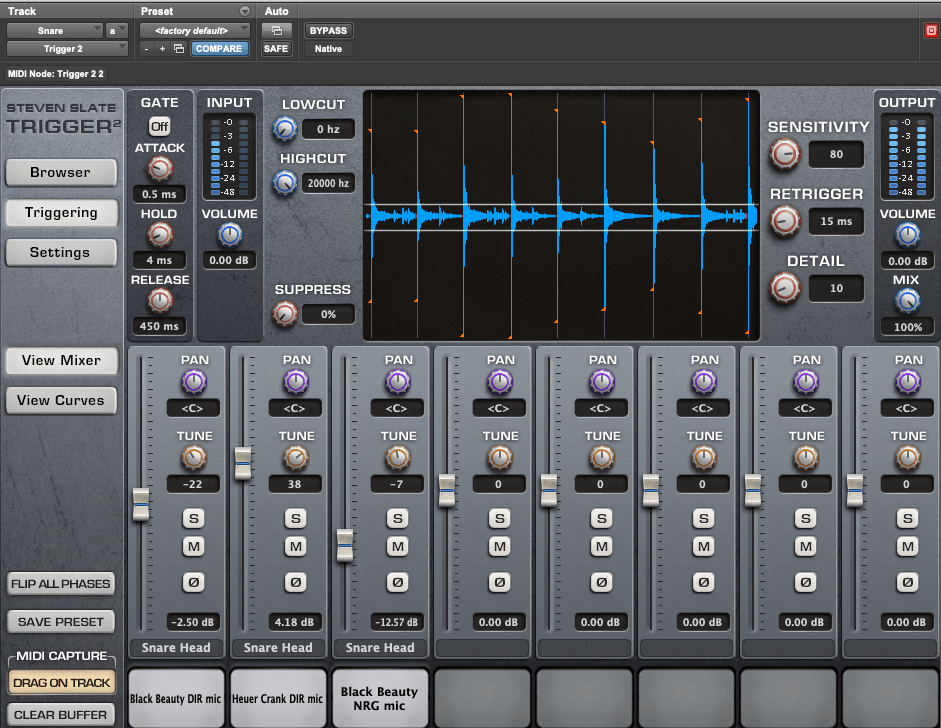
Steven Slate Drums Trigger 2
The SSD, or Steven Slate Drums Trigger 2 plug-in is an incredible tool for enhancing poor and amazing recordings alike. Similar to elastci audio, the SSD plug-in will automatically detect the transients on a track. The senstivity of this detection can be tweaked within the plug-in. By detecting these transients, SSD can be used to replace them with a library of sampled drums sounds, or you can insert your own. Multiple sounds can be mixed together to create any sort of sound like on this kick drum track.
These three sounds mixed together produced a tight and idiomatic sound. I used a similar method to create a snare sound.
These two functions are great for refining a mix. Though I mainly talked about the uses for drums, elastic audio can be used on any audio track imported into pro tools.
Here’s a bounce of the final mix!
Happy Mixing!
Preamp Shootout
MUS410 Adv. Rec. Tech. Assignment #2
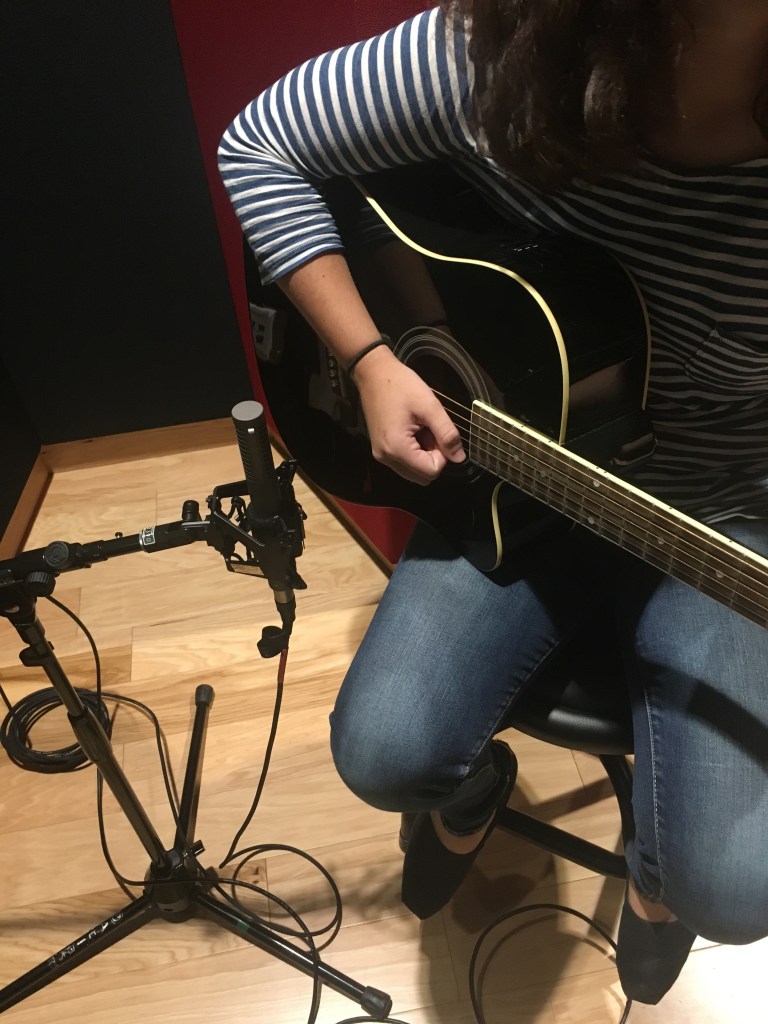
Recently, I went into Studio F and recorded my friend Madie Bishop playing guitar into four different preamps. Madie is not a guitar by trade. I chose to record her because she does not have much studio experience and I want to learn how to teach musicians studio etiquette and procedure. I am sure there will be times when I will have to record sub-par players and make them sound passable.
Research
While researching different techniques to records acoustic guitar I came across a video from Reverb’s Youtube channel. This video displayed several different techniques for placements. I ended up using their third suggestion of placing the mic close to the picking hand because I had done similar things before. Audient has a very helpful article that includes several tips. I especially liked their pros and cons of recording in mono vs. stereo. For this project I chose to record in mono for simplicity.
I chose to shootout preamps as I have very little awareness of their nuances. I compared the Focusrite, Manley, UA, and Shadow Hills preamp. The Focusrite is designed with a vintage solid-state style preamp giving it a slightly colored but still very clean sound. The Manley force is a tube preamp that adds a lot of extra depth and color. The UA can switch between a solid state and a tube preamp or even a combination of both. The Shadow Hills allows you switch between Nickel, Steel, or discrete transformer. “Nickel gives you ruler-flat low end, and a slight (1dB) boost at 10k. Steel adds the personality of a 1dB boost at 40Hz, with a tight Q. The Discrete position yields startlingly fast transients and unmatched clarity.” –Sweetwater Description
The sound of the Focusrite is essentially my baseline. It seems to have a fairly flat sound when compared to others. All of the recordings area bit boomy but I think that is due to my mic being too close to the sound hole of the guitar. The Manley adds a low end depth which is nice for the picking but makes the chords sounds too muddy. The Shadow Hills with those settings adds a level of brightness that none of the others do. The UA with those settings is most similar to the Focusrite with a slight bump to the low end.
My ranking for them on this particular recording would be Shadowhills, Focusrite, UA, then Manley. The Manley and UA really accentuated my bad mic placement. The boosted high end from the Shadowhills made it sound better than it should have, and the Focusrite is generally not awful, but also does nothing notable for the sound.
